Administrator Guides
Administrators have comprehensive control over the system, overseeing various aspects of program and user management. Such as Manage and publish advertisements for nursery and kindergarten programs, assign students to appropriate classes, control user access levels within the system, manage teacher and student information, designate program types and assign them accordingly.

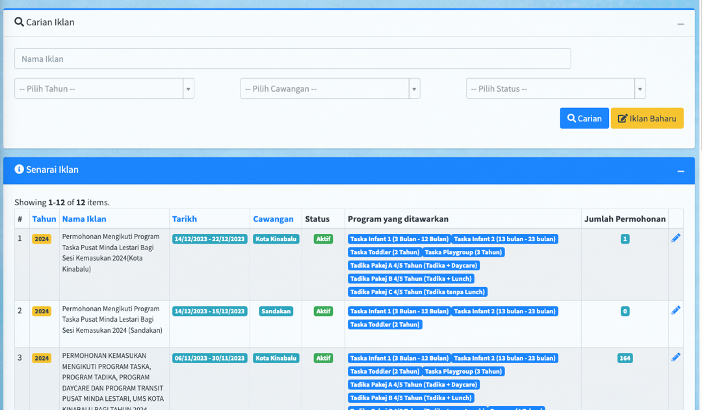
To create a new advertisement for an application opening, go to the ‘Iklan Permohonan’ (Application Advertisement) menu. On the advertisement page, you can filter the list of existing advertisements for easier management. Filters include options like year, advertisement name, campus, and status. To initiate the creation of a new advertisement, click the ‘Iklan Baharu’ (New Advertisement) button. This will lead you to the page or form where you can input the details for the new advertisement.
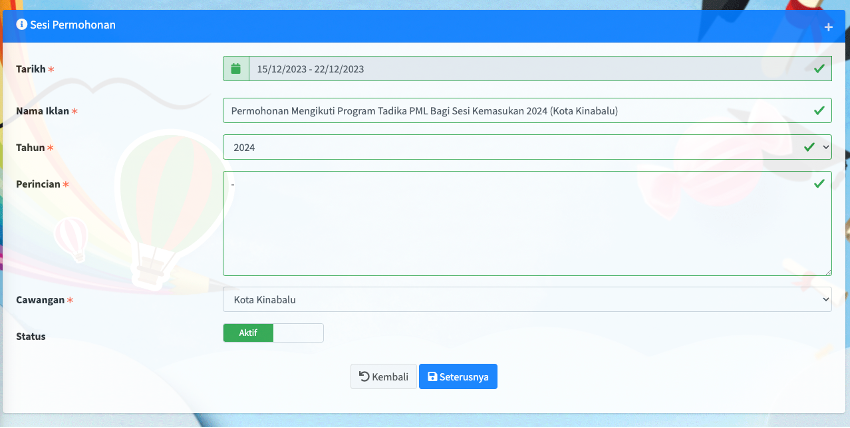
After clicking the ‘Iklan Baharu’ (New Advertisement) button, you will be directed to the advertisement setup page. Enter the necessary information for your advertisement, including:
Date Range: Specify the start and end dates for the advertisement's validity.
Name of the Advertisement: Give a clear and descriptive name to the advertisement.
Year: Indicate the year associated with the advertisement.
Details: Provide detailed information about the advertisement, such as program specifics or requirements.
Campus: Select the campus that the advertisement is associated with.
Status: Choose whether the advertisement is ‘Active’ (currently available) or ‘Inactive’ (not available). After filling in all the required information, click ‘seterusnya’ to continue to the next step in the advertisement creation process.
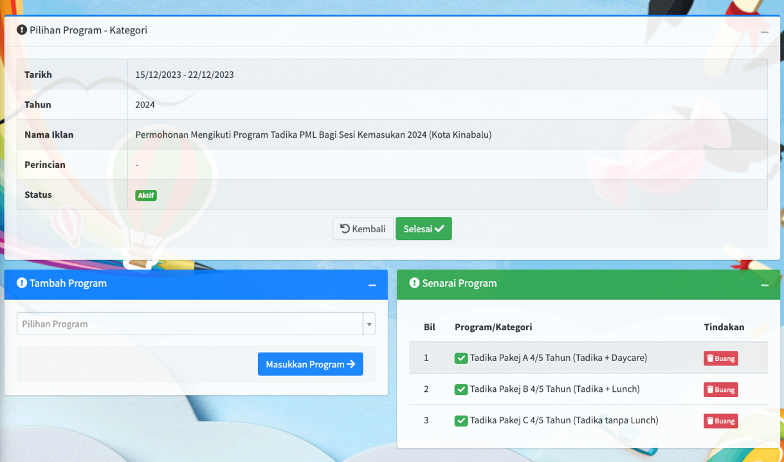
In this stage, you will associate relevant programs with the advertisement. Choose the program(s) that are pertinent to the advertisement. You have the flexibility to add multiple programs to a single advertisement if applicable. After selecting the desired program(s), confirm your choices to ensure they are correctly linked to the advertisement. Once all the necessary details and program associations are completed, click ‘Selesai’ (Finish) to finalize the process and save the advertisement.
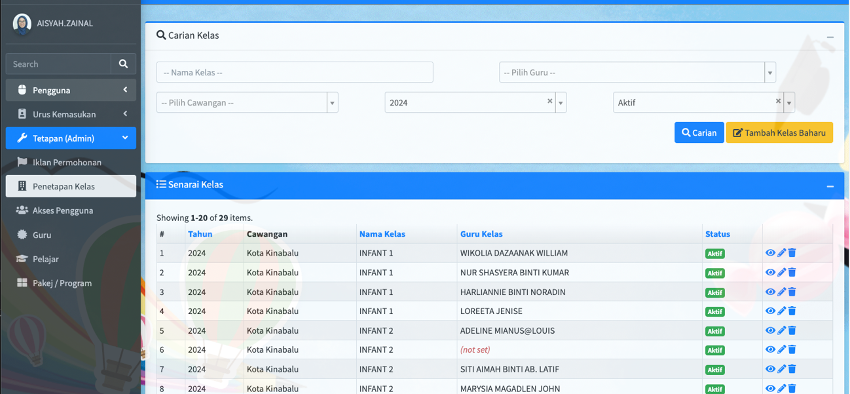
Go to the ‘Penetapan Kelas’ (Class Settings) menu. This is where you can manage class assignments. On this page, you'll find a list of existing classes along with the teachers assigned to each class. If needed, you can filter this list for easier navigation. Use the search function at the top of the list to find specific classes or teachers. add a new class, click ‘Tambah Kelas Baharu’ (Add New Class). This will take you to the section where you can enter details for the new class and assign a teacher.
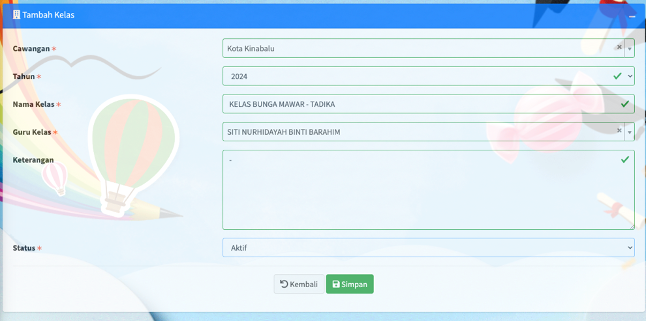
In the new class creation section, enter the required information for the class.
Campus: Specify the campus where the class will be held.
Year: Indicate the academic year for the class.
Class Name: Provide a name or identifier for the class.
Class Teacher: Assign a teacher to the class.
Details: Add any additional information or specifics about the class.
Status: Set the status of the class (Active / Inactive).
Once all the details are entered, click ‘simpan’ (Save) to store the information and create the new class.
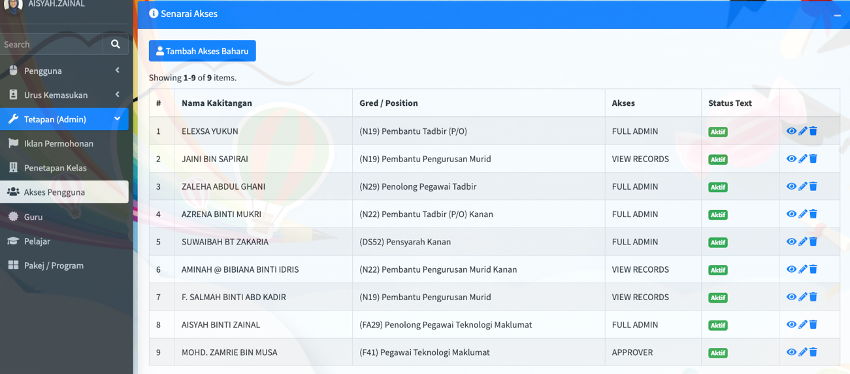
Go to the ‘Akses Pengguna’ (User Access) menu. This section is dedicated to managing user access within the system. On this page, you will see a list of users who currently have access to the system. This list helps you monitor and manage existing access permissions. To grant access to a new user, click the ‘Tambah Akses Baharu’ (Add New Access) button. This action will lead you to assigning access rights to additional users.
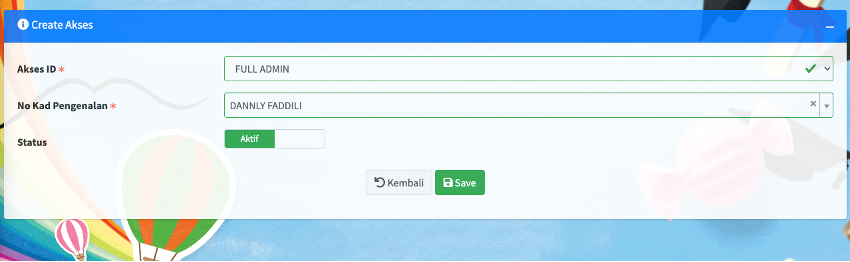
Choose the type of access you want to grant. This could involve various levels or types of permissions within the system. Select the name of the staff member to whom you are assigning the access. Ensure you pick the correct individual from the list or database. Decide on the status of the access (Active / Inactive) based on the needs and role of the staff member. Once all selections are made, click ‘save’ to confirm and apply the new access settings for the chosen user.
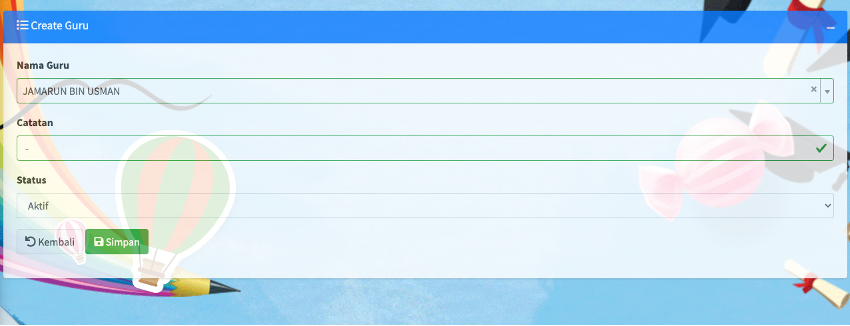
Go to the ‘guru’ (Teacher) menu. This is where you can manage teacher on this page, you will find a list of existing Teacher. If needed, you can filter this list for easier navigation. Use the search function at the top of the list to find teachers. To add a new teacher, click ‘Tambah Guru’ (Add New Teacher). This will take you to the section where you can enter details for the new teacher.
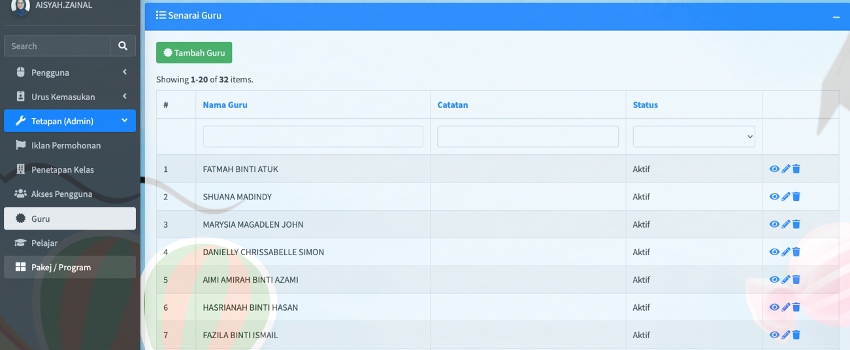
From the ‘Assign New Teacher’ section, choose a teacher's name from the existing staff list. Make sure to select the appropriate individual who will be taking on the teaching role. Enter any relevant remarks or notes regarding this teacher's assignment. Choose the appropriate status for this assignment (Active / Inactive). After completing these steps, click ‘Simpan’ (Save) to finalize and save the new teacher assignment.
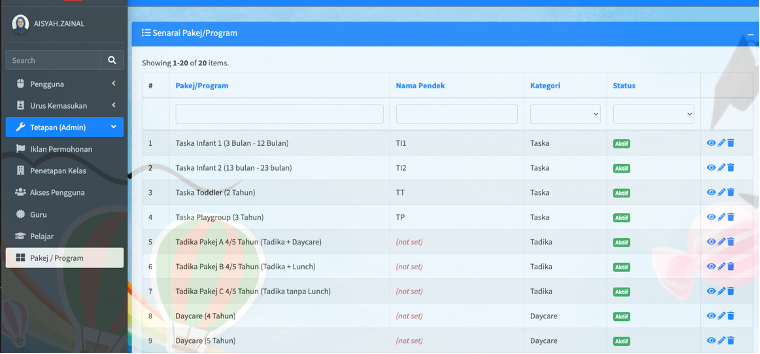
Go to the ‘Pakej / Program’ menu. This section is designated for handling the different packages and programs offered within the system. In this area, you'll find a comprehensive list of all available packages and programs. This list typically includes detailed information about each offering. To find a specific package or program, or to filter through the list based on certain criteria, use the search functionality provided in this section. This feature allows for efficient navigation and management of the various packages and programs.
No Comments